

Hey all! Told you I’ve been busy with tutorials lol!
Today I’m showing you how to make the Batwing Jumper which is such a quick and easy make as it’s only made with 6 pieces of fabric! No fiddly darts or zips so this is an ideal beginner project! You can buy the pattern here at Simple Sew’s website.
This pattern only uses Knitted woolen fabrics, fourway mid weight jersey stretch. There are plenty of places to get your mits on.

I’ve used warm jersey Knit from Whitetree Fabrics it was lovely to use…after numerous attempts on scraps of the fabric to make sure I’d got the stitch right! I ended up using a zig zag stitch with both its width and length reduced:

So remember before starting your sewing on a fabric you haven’t used before use some scraps to make sure you have the right stitch or you could end up ruining some of your lovely fabric.
As always make sure you launder your fabric prior to you starting to cut your pattern pieces out as this allows for shrinkage as it would be a complete shame not to do this before hand and to make an awesome staple Dress, wear it and love it then to put in the wash where it’ll shrink and the dress would be too small to wear!
First open up the envelope and make yourself a brew and read the instructions and make a list of materials/equipment you need if you don’t have them already so no last minute dash to the local haberdashery store or waiting days for online orders lol!

My Construction list:
Simple Sew Batwing Dress Pattern
2.5m of the ever so snuggly warm jersey in navy from WhitreeFabrics.
Guterman Thread – There’s no other thread like it in my opinion, you do need good quality thread as it does show in your creations.
Paper Scissors – For cutting Pattern Pieces out as these will blunt and make cutting fabric out quite uneven!
Fabric Scissors/ Rotary Cutter
Cutting Mat
Pins
French Curve – handy for getting those straight lines whilst tracing or to grade in between sizes if your measurements are in between sizes.
Pencil for marking out the pattern of course
Iron and Ironing Board
And last but not least the Trusty Sewing Machine, Normal sewing foot
Make sure you have plenty of thread in your bobbin as there isn’t anything worse than getting halfway through sewing a long stretch of your garment and to find you have only sewn half of it, trust me this has happened many times LOL

Now then, you can go ahead and cut straight into the paper pattern to the size you require and to make sure you add any nothces/markings onto the paper then cut out the pieces 🙂
According to my measurements i didn’t have to do any grading for a change!! woo-hoo Size 12 cut out – the running is starting to pay off!!
But if you do need to grade in-between sizes check out my previous post here where i show you to do it 🙂
Now with the pattern being only 4 pieces all together it’s pretty easy to cut out and start sewing!
Fold the fabric Right Sides Together selvedge to selvedge and places the pattern pieces on the top. Align the straight grain line on the pattern piece to grain of the fabric and either pin down the pieces, then of course cut away!
Then you should have 1 x Dress/Jumper piece, 1 x collar, 2 x wrist cuffs and 2 x waist cuffs
Now with constructing the Jumper!
First of all with Right Sides Together fold one of wrist cuff in half and repeat for the other cuff.

Then with the Right Side of the Jumper sleeve to the Right Side of the Wrist Cuff pin in place and sew. Press the seam open. Then repeat for the other Sleeve/Cuff.
So it should look like this, a lovely looking wrist cuff:

Now to the Waist Cuff!

Again with the Right Sides Together fold in half the Waist Cuff. Pin in place at the bottom edge of the jumper so you have the raw edges of the Waist Cuff and Bottom Jumper matching 🙂 Sew in place and remember to remove the pins as you sew along. Then repeat for the other piece too.
So your Waist Cuff should look like this:

Now to pull your Jumper so it’s the Right Side together and should look like this now with the Wrist and Waist Cuffs attached

Its looking like a jumper now!
Now to make the Neck Collar:
Fold the Neck Collar over once in half which results in a narrow rectangle, then fold the rectangle in half again to create the funnel Neck Collar:
Then with the Right Sides Together pin along the shortest edge, sew along that edge and the press the seams open:
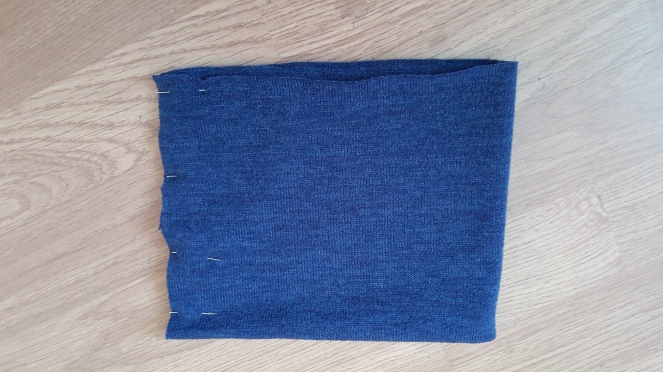
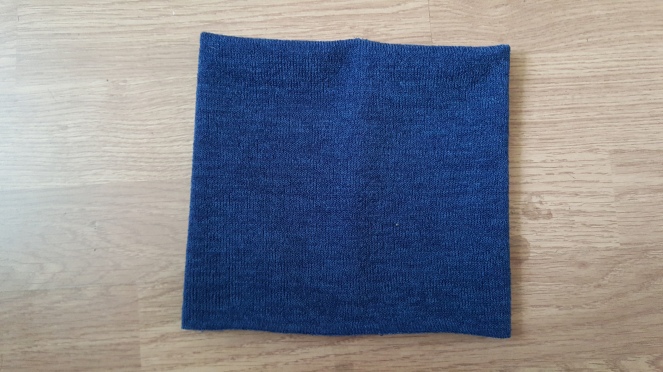
So now you have one Funnel Neck Collar at your disposal 🙂
Now with the Jumper Right Side Together, we need to attached the Neck Collar to the Neck edge.

To do this, I insert the Neck Collar upside down into the the Neck hole of the Jumper so that the Neck Collar raw edges match to the Neck Hole of the Jumper then pin in place like this:

Now remember to take the pins out as you sew along as it’s crucial that you keep the neck collar in the right place 🙂
When turned Right side out it will look like this:
Turn the Jumper so it’s Right Side Together and pin all the way from the end of the Wrist Cuff to the Bottom of the Waist Cuff on both sides of the Jumper.

Stitch in place and press the seams open and hey presto!! You have a Batwing Jumper!
Of course you can’t have a couple of picture of moi wearing it!
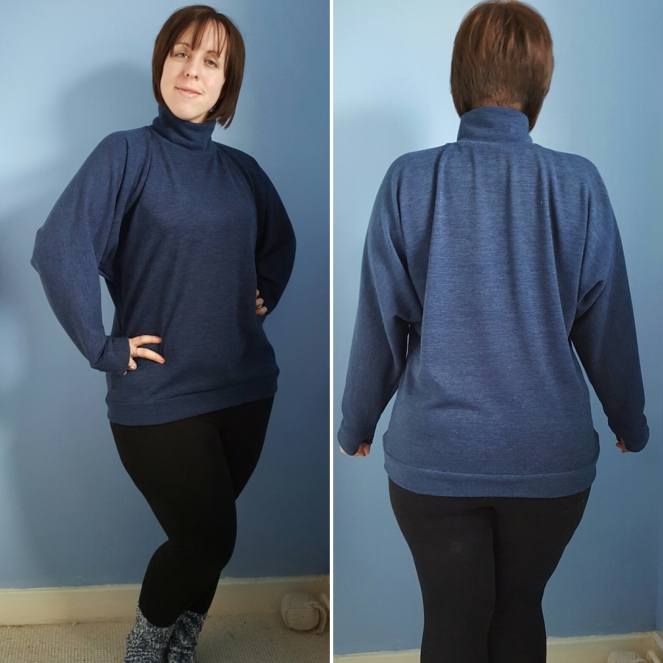
As you can tell its one snuggly and comfy jumper i had to wear it with my leggings and fluffy socks!! Of course it can also be worn quite smartly too! 🙂
A big Thank you to Whitree Fabrics for supplying me with the ever so gorgeous Warm Jersey Knit it has such a lovely drape and weight to it.
So remember peeps Sewing is meant to be enjoyable and to have that satisfaction of making your own clothes is awesome so if you do get stuck please get in touch and i can help before you abandon it 🙂
Sal xx

2 thoughts on “Simple Sew’s Batwing Jumper Tutorial”