

Hello everyone!
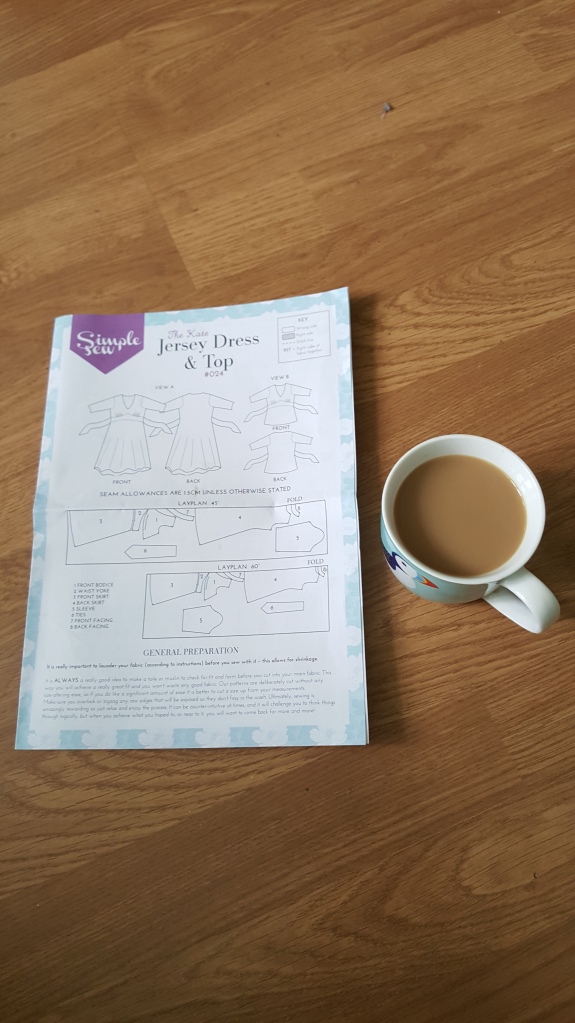
Now as you do… I was going through my stash of Fabrics and Patterns and came across Simple Sew’s The Kate Dress Pattern which was a freebie in Issue 24 of Love Sewing Magazine where you can buy it here as it isn’t available anywhere else!

Now upon reading the measurements on the back, I decided to grade in between the size 8 and 10 for the Bust and Waist but keep the hips at size 10 as the finished garment measurements are quite generous! Where normally i would make a Size 10 for the entire pattern so it’s best to double check your measurements people! Don’t panic I’ll show you how to grade inbetween sizes later on in the post!
As always make sure you launder your fabric prior to you starting to cut your pattern pieces out as this allows for shrinkage as it would be a complete shame not to do this before hand and to make an awesome staple Dress, wear it and love it then to put in the wash where it’ll shrink and the dress would be too small to wear!
First open up the envelope and make yourself a brew and read the instructions and make a list of materials/equipment you need if you don’t have them already so no last minute dash to the local haberdashery store or waiting days for online orders lol!
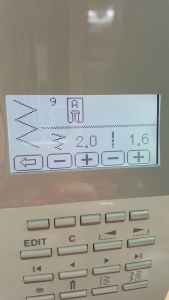
So remember before starting your sewing on a fabric you haven’t used before use some scraps to make sure you have the right stitch or you could end up ruining some of your lovely fabric.
It’s a good job i did as i had to set my Zig Zag Stitch to this:
Construction List:
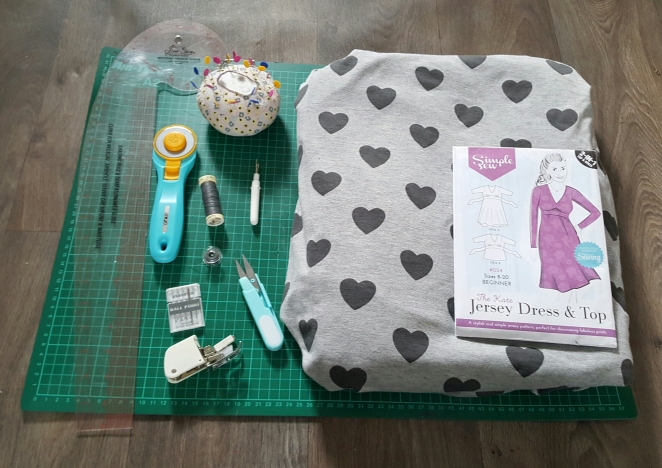
2.5m of Grey Heart Print Jersey from Regency Rags Fabric Store on Ebay
Ballpoint Sewing Machine Needle 80/12
Grey Thread and Bobbin
Paper Scissors – For cutting Pattern Pieces out as these will blunt and make cutting fabric out quite uneven!
Fabric Scissors/ Rotary Cutter – whatever takes your fancy for cutting your fabric, i use both![]()
Snips for the pesky thread that are a bit too long after finishing the seams
Cutting Mat
Pins
Seam Ripper
French Curve – handy for getting those straight lines whilst cutting out with rotary cutter or to grade in between sizes if your measurements are in between sizes.
Pencil for marking out the pattern of course
Iron and Ironing Board
And last but not least the Trusty Sewing Machine and Walking Foot Attachment – No biggies if you don’t have this, just use your normal Sewing Foot and take it steady. The advantages of a Walking Foot is it that helps to feed the fabric through whilst sewing so its evenly put through 🙂
Now if you haven’t a clue how to add on the Walking foot to your sewing machine, I’ll show you how (Little disclaimer here. This is how you attach it to my machine. (I have a Singer Quantum stylist 9960). I think the process is pretty much the same on most sewing machines, but some of these steps might vary a little depending on your machine:
Take off the Normal Sewing Foot and Shank. My foot had a little pressure point at the back to take it off and i unscrewed the shank with a screwdriver.

Lower the needle down into the plate like this so then the Walking Foot’s lever can go above the needle bar:


Then align the screw hole with the the walking foot and screw in with the scrwedriver:


Make sure you have plenty of thread in your bobbin as there isn’t anything worse than getting halfway through sewing a long stretch of your garment and to find you have only sewn half of it, trust me this has happened many times LOL
Now then, you can go ahead and cut straight into the paper pattern to the size you require and to make sure you add any nothces/markings onto the fabric then cut out the pieces 🙂
But if you do need to adjust the pattern to fit as you are in between sizes then double check and I’ll show you how to do it 🙂
Now to grading in between the size 8 and 10, i drew a line in the middle of the two lines and continued it all around the Front Bodice and Waist Yoke but left the Sleeves and Facings as a 10 as there was next to nothing difference and i do like to live dangerously 😉


Now for the Back Dress, I graded in between the sizes 8 and 10 round the Shoulders, Armholes, Bust and Waist. But from the Cutting Line, I graded to the full 10 from there and continued to the hem of the Back dress and I followed the same Directions from the Cutting Line to the Front Skirt piece also to make sure they are graded from the same point.


Also with myself only being just over 5 foot tall i do need to shorten my dresses! With Simple Sew i need to take 4 inches off the length of the skirt as the Bodice fits me a treat!
Now from the Cutting line of the Top, i measured 4 inches from there and drew a line across the width of the Back Dress and Front Skirt.


Now then all you have to do is fold the pattern up to the cutting line and tap down using some sticky tape.


Then we have to match the pattern again so its all aligned again, i used my french curve and drew a line from the taped bit of the pattern down to the rest of the skirt in a nice line to match the pattern, the chopped off the excess. Remember to do that for both the Back Dress and Front Skirt 🙂


Also me being me i do like my tie wraps long so i can tie a nice bow so i cut the pattern from the size 20 line and cut it along.
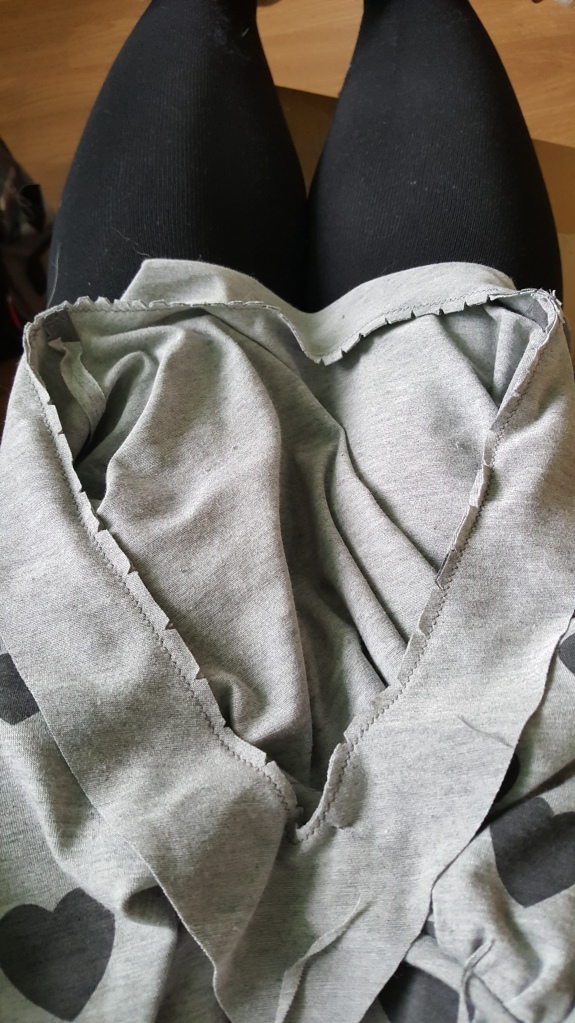
Phew! I’m hoping you don’t have to fath about with grading or shortening the Pattern as it is a very quick sew as you don’t have finish the seams with it being Jersey! Win win!

Now onto the cutting the Pattern Pieces out. Fold the fabric Right Sides Together selvedge to selvedge and places the pattern pieces on the top. Align the straight grain line on the pattern piece to grain of the fabric and pin down the pieces.


Then of course cut away! Remembering to snip any notches on the patterns pieces as you will need these for lining up and sewing later on!
Which then you should have the following pieces:
1 x Front Bodice Piece, 1 x Waist Yoke, 1 x Front Skirt, 1 x Back Skirt aka Back Dress, 2 x Sleeves, 2 x Ties, 1 x Front Facing and 1 x Back Facing.


Hurrah! Now onto the actual Sewing part!
With Right Sides Together, sew the front and back facings at the Shoulder Seams and Press Open.


On the upper Bodice piece, Sew gathering stitches between the notches and adjust the bust gathers till they align with the waist yoke notches. I had sewn a line in between the waist yoke notches to help me line up the bust gathers. I set my machine to a straight stitch with a long stitch. Also remember to leave quite a long thread tails before you start sewing so its easier to gather 🙂


With Right Sides Together, sew the Waist Yoke to the Upper Bodice. Now this can be a bit tricky but remember its Jersey it can stretch so i stretched the waist yoke slightly whilst pinning to fit the V point nicely. Also Start at one side of the Waist Yoke and when you get to the V Point make sure your needle is in the fabric, lift the foot up and pivot your fabric to continue with the V at the other side and remember to put the foot back down before you sew and continue sewing to the other end of the bodice. Once sewn remember to take out the Gather stitches and press the Seam open.
Also gently press the Gathers on the Right Side of the Bodice.


Now onto the Ties!
With the Right Sides Together, fold the waist Tie in half and then start stitching from the end point with a 1cm Seam Allowance and then pivot your needle at the corner then continue on to the end but don’t sew the end shut!


Turn the Tie through to the Right Side and Press and then Hand Stitch the gap closed. Then repeat for the other Tie.


With Right Sides Together, Pin and sew the Skirt Front to the Bodice Front at the Waist. Press the Seams open.


With Right Sides Together, Pin the Dress Front and Back Dress and sew together at the Shoulder Seams and press the Seams open.
Now to pin the facing around the neck hole and to align the Shoulder Seams with the Seams on the facing and sew with a 1cm Seam Allowance.


When you get to the V point of the neckline and to pivot the needle an fabric to continue sewing 🙂


Clip into the Seam Allowance, stopping just shy before the stitching line then turn through and Press.
I found it helped the facing to keep in place by ‘Stitching the Ditch’. Basically I pinned the Facing to the Dress itself and then stitched in the Seam so the stitches can’t been seen and it gives the Facings a better appearance too 🙂


Also i stayed stitched the Facings too as i found them they wanted to keep poking back out the peksy thing! All you do is stitch as close to the Seam to the Facing itself and not to the Dress.

Now to make the Gather for the top Sleeve to fit the Armhole. I used a longer stitch (basically a tack stitch, my stitch length was set at 4.5) at the points where marked on the pattern piece and make sure you don’t back stitch at either end and to leave enough thread to pull it gently to make it Gather.


Then gently fit the Sleeve into the Armhole so it fits in perfectly and remembering that the single notch is the Front and the Double notch is at the back of the Dress :).

Also remember to take out your Gather stitches out too and press the Seams. Then repeat for other Sleeve.
With Right Sides Together and keeping the ties free inside the Dress, pin and stitch the Front and the Back of Dress together. Starting at the Sleeve end all the way round to the bottom of the Skirt and of course repeat for the other side too 😉
Thankfully I didn’t need to take up the sleeves as they were are perfect length for me and I used 0.5cm Hem for them.
Also with me shorten the Skirt before hand, I didn’t have to take any length off and used a 1cm Hem.


Here is the Kate Dress Complete! The Front and Back of the Dress


Then of course myself wearing it and i must say its one classy dress even with my attempt of quirkiness with Heart Print Jersey!

So remember peeps Sewing is meant to be enjoyable and to have that satisfaction of making your own clothes is awesome so if you do get stuck please get in touch and i can help before you abandon it
Sal xx

Looks lovely! Ive not seen a facing done for jersey before, ive always done binding, looks lovely though
LikeLiked by 1 person
Thank you! It is quite simple even though it does like to poke out if not stay stitched lol
LikeLike
i think thats most fabrics isnt it lol
LikeLiked by 1 person
Fab fabric! You’ve done a lovely job and great tutorial. xx
LikeLiked by 1 person
Thank you! I do like my simple sew patterns and what’s better if you can help someone along the way! 😘
LikeLike
Looks great… I’ve just ordered some jersey & was going to do a wrap dress but now I’ve seen yours I might switch to the Kate!
LikeLiked by 1 person
Thank Laura! It is a great pattern really flattering too! My favourite part is the gathering at the bust detail 😁 go on and give it a go! 😘
LikeLike
Looks great on you! I was going to ask you how long this took but then I remembered that taking tonnes of photos along the way increases the time taken by about 10 times! Great tutorial!
LikeLike
Hahaha! If i wasn’t taking the photos and writing up I would say it would of taken me about a day to complete as I had to grade the pattern and shorten before cutting out but once you started sewing it was quick as you don’t need to finish the seams with it being jersey!
LikeLiked by 1 person
Great dress and beautiful fabric: it suits you well. Good tutorial with good pictures.
LikeLike
Thank you 😁
LikeLike
Fab tutorial, I have this is my stash but hadn’t seen it made up. It looks great and fits you so well.
LikeLiked by 1 person
Thanks lynsey! You might as well have a go!! 😁
LikeLike